Chevy rear brake repair diagram
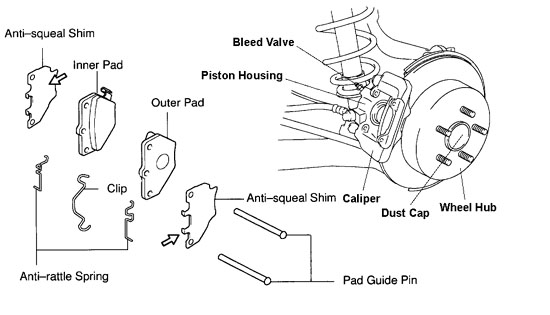
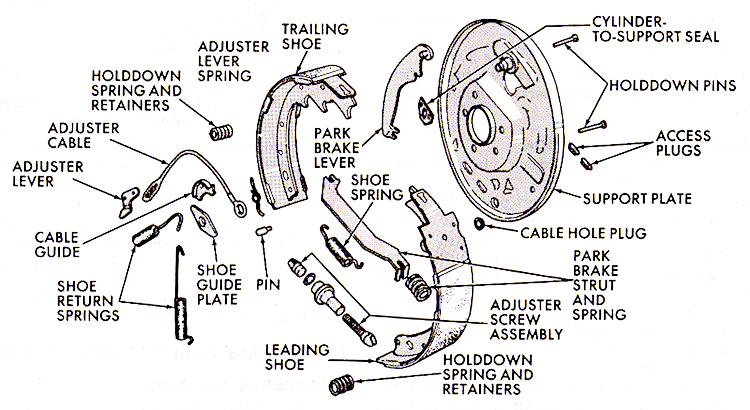
Here you can find a useful Chevy rear brake repair diagram for both rear disc brake repair diagram and rear drum brake repair diagram. If you own a Chevy and each time you try to slow down the car, stop the car, or pull the e-brake when you park the car but the rear brakes seems not working, then it is time to check out the brake according to the diagram.
Basically there are only two types of brake for any Chevy cars which is either disc brake or drum brake. Most of the newer Chevy cars model like the 2011 Chevy Suburban has the rear disc setup on it and only certain older cars model has rear drum setup. Check out what is the setup on your car and the diagram below.
Disc brake repair diagram

Check out the rear disc brake diagram above here. A basic rear disc brake consists of a Piston housing, caliper, dust cap, wheel hub, bleed valve, anti-squeal Shim, inner pad, outer pad, pad guide pin, anti-rattle spring, brake disc mount screw, rear brake rotor, and rear brake caliper mount.
Check out what is needed to be replaced based on the rear brake repair diagram. Generally, brake pads are what you need to change when servicing the rear brake. Brake pads are made of copper, brass, and steel wool shavings held together in a resin. High performance brake pads are usually made of ceramic.
Other things to check on are the piston inside rear brake caliper and rear brake rotor. Cross drill brake discs tends to have better performance because it helps to dissipate heat more efficiently.
Drum brake repair diagram

Usually older car has rear drum brake. It mainly consists of a wheel cylinder, brake shoe return spring, brake shoe retainer springs, emergency brake actuator arm, brake drum, and a pair of brake shoe. You will need a spring removal tool to repair or replace the brake shoe.
Few easy steps to replace the rear brake shoes and wheel cylinder are pretty easy. Remove the return spring and brake shoe mounting springs using spring removal tool, and then you can remove the wheel cylinder and replace with new one. Clean up the support plate before fit in all the new parts. Adjust the brake shoes with the adjusting actuator after you have replaced everything according to the Chevy rear brake repair diagram here.
If you love this article, please PLUS it!
